Thief Mode (usually called Luck Mode when talking about Symphony of the Night) is an alternate mode in some games that increases the player's Luck at the expense of other stats. There are two Castlevania games with this mode: Castlevania: Symphony of the Night and Castlevania: Circle of the Moon.
Game specific information[]
Castlevania: Symphony of the Night[]
Contrary to popular belief, this mode is always available in any version of the game and is one of the few file codes that doesn't require a CLEAR game. On the Name Entry screen, simply enter the name as X-X!V''Q. Alucard begins the game with his Luck maxed out, but he suffers from extremely reduced values for other statistics as follows:
- Luck - 99 (normally, the default is 6, the maximum possible with bonuses is 17)
- HP - 25 (normally, the default is 70, the maximum possible with bonuses is 85)
- MP - 1 (normally, the default is 20, the maximum possible with bonuses is 30)
- Max Hearts - 5 (normally, the default is 50, the maximum possible with bonuses is 60)
- Strength - 1 (normally, the default is 6 or 7, the maximum possible with bonuses is 14)
- Constitution - 0 (normally, the default is 6, the maximum possible with bonuses is 13)
- Intelligence - 0 (normally, the default is 6 or 7, the maximum possible with bonuses is 14)
Additionally, all stat bonuses from Final Stage: Bloodlines won't work, but item bonuses are kept.
Alucard will also start with a Lapis Lazuli in his second accessory slot. This mode generally starts off very difficult but eventually becomes relatively easier as Alucard gains more powerful weapons and armor, which he supposedly should acquire more easily as a higher Luck stat increases the drop rate of items. The exclusive accessory also grants Alucard a starting LCK stat of 119 (the stat listed above is without this accessory).
This mode is also well-known for an exploit that allows Alucard to avoid having his high-level equipment taken by Death early on in the game. The exploit uses the seldom seen "giant knockback" that Alucard suffers if he loses more than half of his current maximum HP at once. When this happens, Alucard is sent flying and will only stop if he makes contact with a surface, such as a wall, and even enemies on the way won't stop him.
To perform it, the player must go into the room immediately before Death is encountered and jump over the first Warg; there's no need to kill the other two (if desired, one can gain a few levels but must avoid getting HP too high; the instructions below will consider Alucard's stats at level 1, though). A charge attack from the Warg will inflict 28 points of damage if the target's Defense (DEF) is zero, and the combined strength of Alucard's equipment grants him a DEF value of 39. The Warg also deals contact damage with an ATT of 20, so touching it rather than waiting for its attack is also an option, but this will require that more items are removed. The idea is to lower Alucard's DEF just enough so the Warg's attack can deal damage that is higher than half of Alucard's maximum HP. The player must position Alucard between the first (or second) Warg and the doorway that leads to Death, remove some of the defensive equipment that he starts with (the Alucard Mail and Necklace of J will suffice), and then let Alucard be hit by the Warg's charge attack (Alucard's current HP must be over 14 for him to survive). Success will catapult Alucard out of the room, through the Death cutscene, and into the next room. While Alucard is flying across the screen after being tossed, it is possible, if the player is fast enough, to open the menu and re-equip any of the items that were removed. Either the first or second Warg can be used for this trick. The first one is preferable because Alucard will be sent flying for longer, which gives the player more time to open the menu and re-equip the removed items.
Once Alucard gets past Death, the music will stop, and the player cannot open the menu to re-equip their items at this point. The game proceeds as normal, but the player must defeat the first Bone Scimitar enemy while unable to open the menu. Contrary to popular belief, Alucard doesn't need to be "naked". Not all items need to be removed. The Alucard Sword can be left equipped, as it gives no DEF bonus. If Alucard is still at level 1, with 25 HP and 0 CON, the toss will work with just the Alucard Mail and Necklace of J removed; the rest can be left equipped, and there are other combinations of equipped and unequipped items that will work. Saving the game allows the player to open the menu and re-equip the items that were removed.
It should be noted that going back to the area where Death is before loading the Alchemy Laboratory will still result in Alucard's equipment being stolen. And falling into the Death area from the upper rooms will softlock the game. After the Alchemy Laboratory is visited once, the room reverts to its normal state and will contain either Slogra and Gaibon, if they haven't been defeated yet, or nothing at all. In the mobile version, Alucard can go back to the Death area after being tossed, and Death won't be there to steal his items (see "Skip Death Method 2" on External links).
If Death is skipped in this way, the entry "Meeting with Death" will be permanently missing on the Time Attack list for that playthrough.
In the Saturn version, this trick is still possible but has a low success rate, as Alucard will often hit a wall on the way or stop short of getting past Death, so it will require very precise positioning and may take several attempts.
In the DXC version of the game, it is possible to skip Death by just holding left on the d pad as Alucard walks into the room where Death is, and it doesn't require Luck Mode, so this trick isn't necessary (although it still works in this version). Also, skipping Death in this version does not prevent the player from having a complete Time Attack list, as the "Meeting with Death" will still register even if Death is skipped by using either method (see "Skip Death" on External links).
Castlevania: Circle of the Moon[]
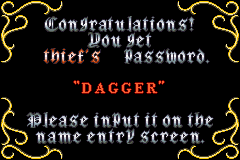
Thief Mode in Circle of the Moon is only available after the player beats the game in all other modes (which happens right after beating Shooter Mode) and inputs the name "DAGGER" at the Name Entry Screen when starting a new game. It serves the same purpose as it did in Symphony of the Night, by increasing Nathan's LCK significantly, but at the cost of reducing other stats. The starting stat handicaps aren't as severe as in Symphony of the Night's, and not as many stats take a handicap, although it continues the trend every time Nathan levels up.
Statistics and their respective increments per level start as follows:
- Luck - Starts at 1,600, increases by 160 (capped at 9,999)
- Hit Points - Starts at 50, increases by 5 (half as much as normal)
- Mind Points - Starts at 50, increases by 5 (half as much as normal)
- Strength - Starts at 71, increases by 7
- Defense - Starts at 50, increases by 5 (half as much as normal)
All of these stats normally start at 100 and increase by 10. Intelligence and number of Hearts are unaffected in this mode. Having this high luck means that all items have at least 16 times their basic drop rate, easily hitting the 50% (common drop) or 25% (rare drop) cap.
See also[]
External links[]
| Castlevania: Circle of the Moon | |
|---|---|
| Characters | |
| Protagonist
Supporting cast Antagonists | |
| Bosses | |
|
Cerberus • Necromancer • Iron Golem • Adramelech • Dragon Zombie • Death | |
| Areas | |
|
Sealed Room • Catacomb • Abyss Stairway • Audience Room • Triumph Hallway • Outer Wall • Machine Tower • Eternal Corridor • Chapel Tower • Underground Gallery • Underground Warehouse • Underground Waterway • Observation Tower • Ceremonial Room • Battle Arena | |
| Music | |
|
Awake • Proof of Blood • Fate to Despair • Castlevania: Circle of the Moon and Castlevania: Harmony of Dissonance Original Soundtrack | |
| Guides | |
| Archives | |
|
Bestiary • Inventory • In-Game Formula • Magician Mode • Fighter Mode • Shooter Mode • Thief Mode | |