
Garibaldi Temple Map
The Garibaldi Temple (Cathedral of Garibaldi in Japanese version) is the third stage of Castlevania: Curse of Darkness. It is entered through the Baljhet Mountains and needs to entered in order get the Brute Force skill, which is needed to enter the Mortvia Aqueduct from the Baljhet Mountains. It is also where Hector first meets St. Germain, first fights Trevor Belmont, and later on in the game is the home of the powerful optional boss, Legion and Nuculais.
Geography
Outside the Temple
Mountains
The first section of this stage is essentially coming down from the mountains and a continuation of the Baljhet Mountains. Skeletons and Orcs are found here.
Tower of Evermore
Coming out of the mountains is a large tower, the Tower of Evermore. This tower cannot be entered at this point of the game. It is guarded by Orcs and an Efreet. In the distance, you can see the Tower of Eternity. This Efreet comes back when you re-enter the area after killing it, so it is another chance to try to get steel Sun Tears.
Backtracking: The Tower of Evermore is not entered from this area, it actually exits here. Once you make it to the top of the Tower of Eternity in the Forest of Jigramunt, you can use the Long Glide ability to enter the Tower of Evermore from the top and then descend the tower and exit here.
Temple Front Yard
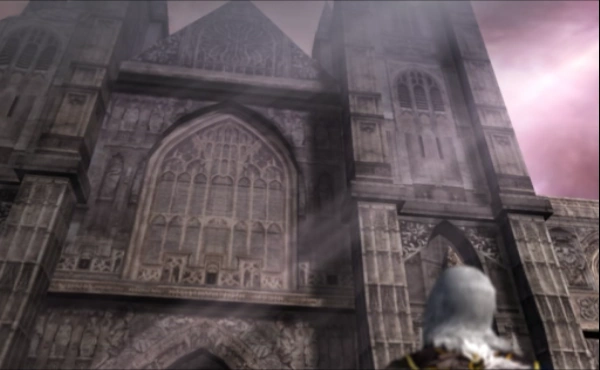
Hector gazes at the temple's window
You next encounter St. Germain, who tells you he wishes you to stop pursuing Isaac. Around either side of the temple can be found some items. On the north side is a Memorial Ticket, on the south is a candle stick.
Secret: On the south side, there is a cracked wall that can be broken to reveal an HP Max Up. Trevor instead finds an ATK Up.
South-East Wing
The temple itself is full of stained glass windows and adornments. A Cyclops and Bone Soldiers will smash through the stain glass window and attack. The Bone Soldiers will commonly drop Steel, but they will not return once defeated and they do not show up for a while longer. They will rarely drop a Knight's Vein, but this is commonly found in the 2nd Floor by other enemies.
Once the dust has cleared, you are free to explore the rest of the temple and are presented with a choice to go left or right. The temple is symmetrically arranged and its main axis runs east-to-west. Either path will go north or south for a while, then head west, and then angle in and meet each other again. The north and south branches both have their own outer loops. The west end of the south loop is run down though and is actually a broken loop. From each of these four parallel east-west hallways, a Battle Room is found on the side. The halls are filled mostly with Flea Men. They come in very large numbers and can do a lot of damage, but also commonly drop hearts which your Fairy-Type familiar can use to heal you back up. The battle rooms are populated with Armor Knights and Flea Men. They all house items that don't increase your power. One holds a Garibaldi Temple Map, another a Memorial Ticket, another a Potion, and another the Marker Mode, which allows you to place markers on maps. The run down wing has Serum at the end of it (before you have to turn back) and is guarded by Ghosts.
The area where the inner hallways converge is guarded by an Armor Knight. Heading east down the middle leads to the courtyard balconies of the South-West Wing (initially blocked by some more Armor Knights). Heading west leads to the main floor of the South-West Wing.
South-West Wing
The atmosphere shifts and the music changes in the south-west wing. Instead of a God-glorifying architecture, a more studious atmosphere is presented. Throughout the area, courtyards of different sizes can be entered and walked by.
Courtyard Balconies (2nd Floor)
A long hallway doubles back above the hall you had come from, where a Dead Baron greets you. This leads to a rectangular area that contains four courtyards, one in each of its corners. Above each of these courtyards is a balcony which holds an item (including a 2 Uncurses and a Serum, Trevor finds the Wind Whip here.). The halls are filled with Armor Knights and Fenrirs, while a Dead Fencer guards these items on each balcony. If you want to obtain a drop item or steal from this enemy, be sure not to push it over the edge, unless you want to jump after it, which you can. Jumping over the edge leads to the lower levels of the courtyard areas.
Dead Barons and Dead Fencers both commonly drop Knight's Veins and can be robbed for a Holy Man's Vein. These will allow you to create a Zweihander, Lance, Gallic Helmet.
Temple Courtyards (1st Floor)
The temple courtyards can be entered either from the main temple or from jumping over the edge of the courtyard balconies. It consists of four courtyards embedded in a square, with one in each corner. Armor Knights and Dead Fencers patrol the outer parts and a seemingly inexhaustible supply of Fenrirs and Fleamen are inside the courtyards. On the south-western section is a battle room with Dead Fencers and Armor Knights. Visible from this room is another part of the monastery, but which has a cracked wall that you cannot get through at this point. The north-western courtyard room leads to the courtyard perimeter hallways.
Backtracking: Once you have a Devil-Type ID with the Magic Circle ability, you can return to the cracked wall room and use the Magic Circle to slide underneath the wall. It leads to a stretch patrolled by Dead Barons, Armor Knights, and Thieves and harbors a Coffee Cup chair and an Ether. A path will then take you to the Inner Catacomb level where you will fight Legion.
Courtyard Perimeter Hallways
This is a long stretch of hallways from which you can see various courtyards from windows, but cannot actually enter those courtyards. It is inhabited by Blaze Masters, Wizards, and Fenrirs. Blaze Masters commonly drop Ancient Memories and a Ceremonial Tool can be stolen from them with difficulty. One of the first rooms is a battle room full of Blaze Masters, Fenrirs, and Dead Fencers, and also holds a Ceremonial Tool, so you should be able to get at least one.
Ancient Memory will allow you to build a Bamboo Sword, Bullova (axe), Club, Baghnakhs (fist), or Lorica (armor). If you were lucky enough to have a Spirit of Fuji (rare drop from a Wizard) and a Steel (common drop from rare Bone Soldier) earlier in the game, you can evolve a Bamboo Sword to a Nodachi. You could also evolve the Club into a Bat with Steel. The Ceremonial Tool can be used to create an Ada, Sasumata (with a Spirit of Fuji, a lance, which can become a Naginata with Steel).
At the end is a save point and then the North-East Wing.
North-East Wing
The North-East wing is another stain-glassed area like the South-West Wing. Notable are large angel statues visible outside the windows and within the halls. The path ahead forks and then converges, encircling another courtyard. This area is populated with Lesser Demons (which you also can steal Spirit of Fuji from) and Wizards.
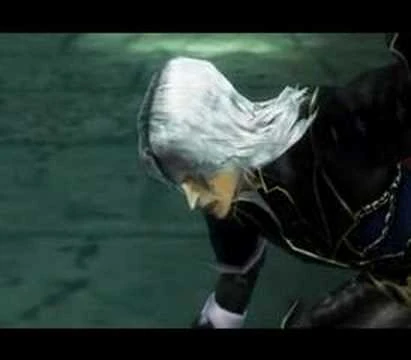
The path continues east and then doubles back to go west. This is populated with Phantom Swords and Vandal Swords. At the end is a large congregation room where Hector meets and faces Trevor Belmont. He will be surprised by your weakness and doubt you are actually a devil forge master. When playing as Trevor, you will fight against the Trevor Doppelganger.
North-West Wing
The North-West Wing maintains the study-like atmosphere of the South-West Wing, but retains the music from the North-East Wing. You enter it from the room where you fought Trevor in in the North-East Wing and the first hall has three other doors in it. The first one is the second teleport chair and will lead you back to near Julia's Shop. The one facing forward is blocked by a heavy door Hector cannot lift. The second door on the right is a room that will grant your Battle-Type innocent devil the Brute Force ability (Trevor will find an HP Max Up instead). If you do not have a Battle-Type with you, you can always use the teleport chair to get it back from Julia, and then use the chair to come back. Once you have this ability, you will have a choice. You can either use Brute Strength to open the heavy door in the temple. This will lead to an optional and somewhat challenging section of the temple. Or, you can return to near Julia's shop, and use the Brute Force ability to lift the door near the entrance to the Mortvia Aqueduct and start playing that level.
Beyond the heavy door in the temple is an area filled with Thieves. The presence of thieves indicates that you have entered a bonus area of the game. They will try to steal your items. You can get them back by killing them. They will never drop anything else, and you can only steal $1 from a thief itself.
There's a branching room ahead. Taking the left option takes you around a dry water fountain into an area with Slogras. They are guarding the entrance to the Outer Catacombs, which you can enter if you feel that you are up for the challenge.
Taking the room ahead leads to a winding path populated with Thieves that ultimately dead ends to a prize room containing another Sun Tears.
Catacombs (1B Floor)
The catacombs are a series of tunnels filled with bones and skulls underneath the Garibaldi temple. The music changes to moaning and torturous sound effects. Later on, the Inner Catacombs also features a heart beat sound effect.
Outer Catacombs
This region is accessible from the North-West Wing. It is an optional and difficult area. It spirals downwards beneath the perimeter of the western part of the temple. At first, it is pretty easy, with only thieves and skeletons to contend with. Then Ectoplasm, Wizards, Lesser Demons, and Slogras will also oppose you in various combination in different sections and must be defeated before being allowed to descend further. Ectoplasms are the first enemies to Curse you and will on a rare occasion drop a Curse Sealing Ring.
At the very bottom is an area containing Sixth Sense Brooch, which places an exclamation mark above an enemy's head when it is about to strike (Trevor instead finds a DEF Up). There is no outlet at the bottom, so you must either head back up the way you came or use a Magical Ticket or Memorial Ticket.
Inner Catacombs
This region is accessible from the South-West Wing once you have the Magic Circle ability. It leads to Legion and Nuculais, the powerful optional boss of this game.
Dialogue
| Dialogue Data: Garibaldi Temple (edit) | ||
|---|---|---|
| Image / Participants | Game / Location / Title Details Transcript(s) (click Expand to view when necessary) | |
Temple Front Yard | ||
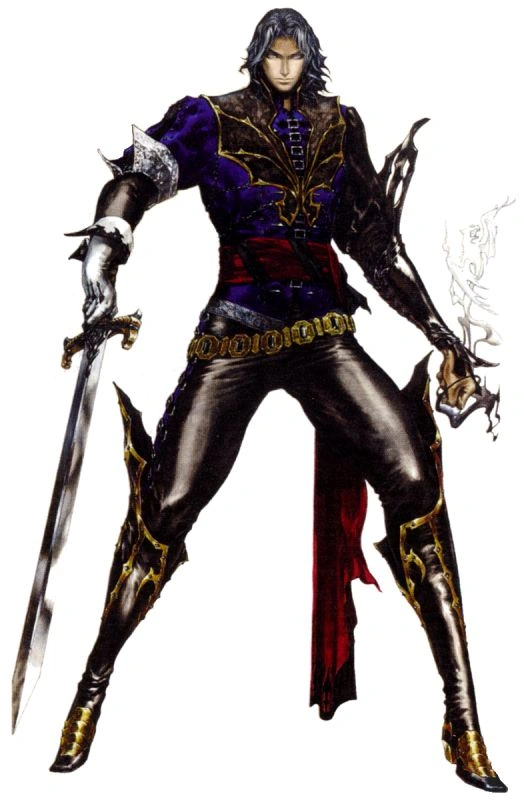 Hector Hector
|
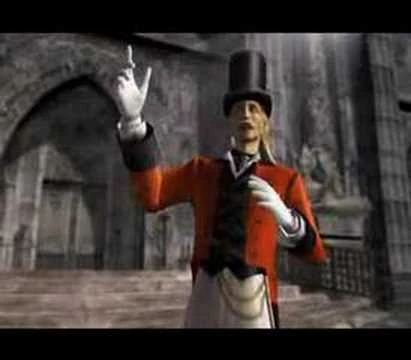
Castlevania: Curse of Darkness / Garibaldi Temple (Front Yard) / Saint Germain Enters Background Music: A Man Who Knows Too Much When: First Meeting with Saint Germain (Hector walks toward the front of Garibaldi Temple and looks up to behold its magnificence. Suddenly, the feet and legs of some unknown figure start to walk toward him. Hector seems slightly startled) Saint Germain: I've been waiting for you. Hector. Devil forgemaster. | |
North-East Wing | ||
| Hector
|
Castlevania: Curse of Darkness / Garibaldi Temple (North-East Wing) / First Meeting with Trevor When: First Meeting with Trevor (Hector walks into the room) Trevor: Wait! That crest... Are you the devil forgemaster? | |
| Hector
|
Castlevania: Curse of Darkness / Garibaldi Temple (North-East Wing) / "Are You Not Trevor Belmont?" Background Music: The Man Who Destroyed Dracula When: After the First Trevor Boss Fight (Both Hector and Trevor step away as the battle dies down. Hector falls to his knees then nearly hits the ground) Trevor: On your oath, are you truly the devil forgemaster? | |


Item Data
New Materials Found
- Knight's Vein
- Holy Man's Vein
- Ceremonial Tool
- Sun Tears (was rare before)
- Spirit of Fuji (was rare before)
- Steel (rare)
External Links
- Game FAQs - Map by Starion
- Game FAQs - FAQ/Walkthrough by Berserker
- Game FAQs - Enemy/Steal Guide by DanteRules
- Game FAQs - Combine System Guide by djwassabi