The Royal Chapel is a location in Castlevania: Symphony of the Night.
Geography[]
The Royal Chapel is the sixth stage in the game that you need to go to in order to get the first ending of the game. It is entered from the Alchemy Laboratory once you have obtained the Jewel of Open from the Long Library. It leads to the Castle Keep. It also leads to the Colosseum, but you will not be able to navigate beyond that room in that stage until you have found another way in through Olrox's Quarters. The Reverse Castle's version of this stage is the Anti-Chapel.
Guide[]
The Royal Chapel is a place of worship that seems quite out of place in the evil castle of Dracula. It is an area that reaches mostly upward with its large bell towers and long stairways. Stained glass windows and long rows of pews are evident in the main chapel area, which looks more like the interior of a cathedral and even more out of place in Dracula's castle. The chapel has long halls on either side of each tower leading to separate rooms (one of which you will only be able to proceed through once you acquire the Spike Breaker and the Form of Mist, but is necessary to obtain the game's true ending). Some of these elongated halls are necessary to traverse in order to reach the boss of this area.
The Royal Chapel also contains its own Confessional Room where a ghostly priest will sit down and listen to the player's confessions on one end of the humbling window that's provided. With this, he will either give you a bottle of Grape Juice (in the Japanese versions of the game, it's wine), hurt you, or leave after crossing himself. The effect appears to be randomized, and one can tell when attack is imminent if the priest is wearing a grey robe, and has red eyes. Alucard can also take the place of the priest, in which case a confessor will confess her sins (if in red) or attack you (if in blue-green). You do not get an item from her.
Dialogue[]
| Dialogue Data: Royal Chapel (edit) | ||
|---|---|---|
| Image / Participants | Game / Location / Title Details Transcript(s) (click Expand to view when necessary) | |
|
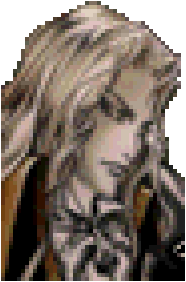
Castlevania: Symphony of the Night / Royal Chapel / Third Encounter with Maria [edit] When: After defeating Hippogryph Summary: After defeating a Hippogryph, it's apparent that Maria had been watching their battle and she comments on how strong he is. Alucard wants her to get to the point. She then asks him what he knows about Richter Belmont and explains she's been searching for him. Maria: Impressive. You're very strong. Alucard: .......... What is it you want? You didn't come here to tell me that.  (Maria is watching over Alucard) Maria: You look like you're doing well for yourself. (dialogue at 0:15) Maria Renard: すごい腕前。 私の出番なんて無いみたいね。 video - Nico Nico Douga video (registration required) (Maria is watching over Alucard) Maria Renard: Impressive! Looks like you don't need my help.  (dialogue at 5:24) (dialogue at 5:24) | ||
|
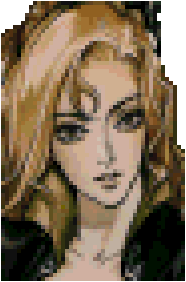
Castlevania: Symphony of the Night / Royal Chapel / Fourth Encounter with Maria [edit] When: After crossing spike room Summary: Alucard tells Maria that he found a Belmont, who could be Richter, the one she was looking for, but that he was an enemy and claimed to be the lord of this castle. Maria cannot believe this, gets upset, and leaves. Maria: So did you find Richter? Alucard: I don't know if he's the one you're looking for, but I found a Belmont. Maria: Alucard. Have you seen Richter? Alucard: There is a Belmont here. You were right about that. Maria Renard: どう? リヒターは見つかった? video - Nico Nico Douga video (registration required) (Alucard arrives at the room where Maria is staying) Maria Renard: So? Have you seen Richter?  (dialogue at 30:27) (dialogue at 30:27) | ||
Enemy Data[]
- Main article: Royal Chapel/Enemy Data
Item Data[]
- Hover mouse over the "(...)" in the Found column for more details on how to find an item in the Royal Chapel.
| Item Data: Royal Chapel | ||||||||
|---|---|---|---|---|---|---|---|---|
| Image | Name - Game Type - Users Description |
Attributes / Consume | Statistics / Sell | Found | Notes | |||
| Fairly valuable ring [salable] | ATT + 3 (with Jewel Sword - Saturn only) Sell: $800 |
Find: Royal Chapel (...) (all) Drop: Black Crow, Killer Fish Create: Jewel Sword |
||||||
| Comfortable eye protection | DEF +1, INT +4 |
Find: Royal Chapel (...) |
||||||
| Armored knight's shield | DEF +2 |
Find: Colosseum (...) (all) Drop: Spectral Sword, Slinger |
Effect: Projectile block Special: Shield Rod or Mablung Sword spell (10 MP): Summon Horse – Offense Up (ATT +20) for 68 seconds | |||||
| Sparkling juice [use] | HP +20 |
Find: Royal Chapel (Confession Room) (...) (all) |
||||||
| Increases the player's maximum HP (life) capacity. | Maximum HP +5 (Alucard); maximum HP +10 (Richter and Maria) |
Find: Royal Chapel (...) (all) Drop: Most bosses |
Effect: Restores all life and increases Max HP | |||||
| Temporarily raises STR [use] | STR +20 |
Find: Royal Chapel (...) (all) Drop: Wereskeleton |
Effect: STR +20 for 68 seconds | |||||
| Silver breastplate | DEF +6 |
Find: Royal Chapel (...) (all) |
||||||
| Assails foes with holy scripture. (...) | Attrib: Holy Consume: 5 Hearts (Alucard/Richter/Maria) |
ATT +8 (Alucard); ATT +5 (Richter); ATT +15 (Maria) |
Find: Royal Chapel (...) (all) |
Effect: Spins around the character. Two can be active simultaneously (Richter and Maria only) Special: Item Crash (Richter only; Cost: 15 Hearts; ATT +80, Attrib: Hit) | ||||
| Damages enemies with sacred ash. (...) | Attrib: Holy Consume: 3 Hearts (Alucard), 1 (Richter), 2 (Maria) |
ATT +8 (Alucard); ATT +20 (Richter/Maria) |
Find: Royal Chapel (...) (all) |
Effect: Thrown on ground (Alucard/Richter); thrown on ground and explodes afterward (Maria) Special: Item Crash (Richter only; Cost: 10 Hearts; ATT +20, Attrib: Holy/Hit) | ||||
| Sparkling ring [salable] | ATT + 1 (with Jewel Sword - Saturn only) Sell: $150 |
Find: Royal Chapel (...) (all) Drop: Merman, Blue Raven Create: Jewel Sword |
||||||
| Increases the player's maximum HP (life) capacity. | Maximum HP +5 (Alucard); maximum HP +10 (Richter and Maria) |
Find: Royal Chapel (reward) (...) (all) Drop: Most bosses |
Effect: Restores all life and increases Max HP | |||||
| Restores some HP [use] | HP +50 |
Buy: $800 Find: Royal Chapel (...) (all) Drop: Bat, Corpseweed, Will O' Wisp (Saturn-only) First Obtained: (May start with) |
||||||
| Sword of the English Navy |
Attrib: Cut |
ATT +7 |
Find: Royal Chapel (...) (all) Drop: Sword Lord, Corner Guard, Owl Knight |
|||||
| Increases MP restoration rate | Find: Royal Chapel (requires Leap Stone) (...) (all) Drop: Bitterfly |
Effect: Doubles MP restoration rate, does not stack | ||||||
| Shoots a magic arrow [use] | Attrib: Cut |
ATT +30 |
Buy: $300 Find: Royal Chapel (requires Leap Stone) (...) (all) Drop: Bone Archer, Bone Musket, Sniper of Goth |
|||||
| Japanese throwing star [use] | Attrib: Cut |
ATT +50 |
Buy: $2,400 (later) Find: Royal Chapel (requires Leap Stone) (...) (all) Drop: Flying Zombie, Jack O'Bones |
|||||
| Improves heal item power | Find: Royal Chapel (requires Leap Stone) (...) (all) |
Effect: Causes Potions and High Potions to heal an additional 50% | ||||||
| Creates pillar of flame [use] | Attrib: Fire |
ATT +60 |
Find: Royal Chapel (requires Leap Stone) (...) (all) Drop: Bomb Knight, Skeleton Ape |
|||||
| Anti-aerial weapon [use] | Attrib: Hit |
ATT +30 |
Buy: $500 Find: Royal Chapel (requires Leap Stone) (...) (all) Drop: Skelerang |
|||||
| Spiked iron club | Attrib: Hit |
ATT +11 |
Find: Royal Chapel (requires Leap Stone) (...) (all) Drop: Flail Guard |
Effect: Flail (normal) | ||||
Gallery[]
")
")
")
")
")
")
")
")
")
")
")
")
")
")
")
")
")
")
")
")
")
")
")
")
")
")
Related stages[]
- Alchemy Laboratory - The area that proceeds this one for Alucard.
- Colosseum - Connected area. Can be "previewed" from the Royal Chapel initially, but cannot enter far into, so Alucard must return to the Royal Chapel.
- Olrox's Quarters - Connected area (initially accessible from Olrox's Quarters).
- Castle Keep - The next stage for Alucard.
Other appearances[]
Castlevania: Symphony of the Night (handheld)[]
The Royal Chapel is the second stage of the LCD handheld version of Castlevania: Symphony of the Night. Bats join the Zombies and Medusa Heads that were fought in Stage 1. Defeating the boss called Hipogryph (actually Gaibon) will give Alucard the Silver Ring.
Castlevania Puzzle: Encore of the Night[]
The Royal Chapel in Encore of the Night includes some enemies from the original Royal Chapel and from its inverted version, the Anti-Chapel. It has several enemies from other areas as well. This includes the most powerful, and optional, boss in the game, Galamoth, and his servant the Frozen Half. The original stage boss Hippogryph, does not appear in this game.
Castlevania: Moonlight Rhapsody[]
- Main article: Royal Chapel (Moonlight Rhapsody)
The general layout of the Royal Chapel (called Heresy Chapel in Chinese) in Moonlight Rhapsody is similar to its layout in Symphony of the Night. The bell tower area and boos room also appear in the Lost Fantasy stage.
Trivia[]
- In the Japanese version of Castlevania: Symphony of the Night, the blue priest in the Confessional Room will speak a line. His dialogue is taken from the church Priest from Castlevania II: Simon's Quest.
- A line was recorded by Dennis Falt for the original English release of the game but not used: "Come son, rest here. In the name of the Father, the Son, and the Holy Spirit. Amen."
- The line was rerecorded by Tony Oliver for The Dracula X Chronicles port of the game (as well as versions based on it) and used in the English version: "Rest your weary soul here. May the Father, the Son, and the Holy Ghost be with you. Amen."
- It is unclear as to how Maria entered and exited the top-left room located past the spike-filled hall, as Mist Form is needed to pass through it. Further adding to the confusion is that Maria cannot enter this room in Maria Mode.