- See also: Frankenstein (disambiguation)
The Creature, sometimes referred to simply as Frankenstein or Frankenstein's Monster, appears as a boss or as a regular enemy in several Castlevania games. It has immense strength and physical prowess. It may control electricity and sometimes can use different kinds of weapons. In some games, it is encountered alongside Igor.
Origins[]

.jpg)
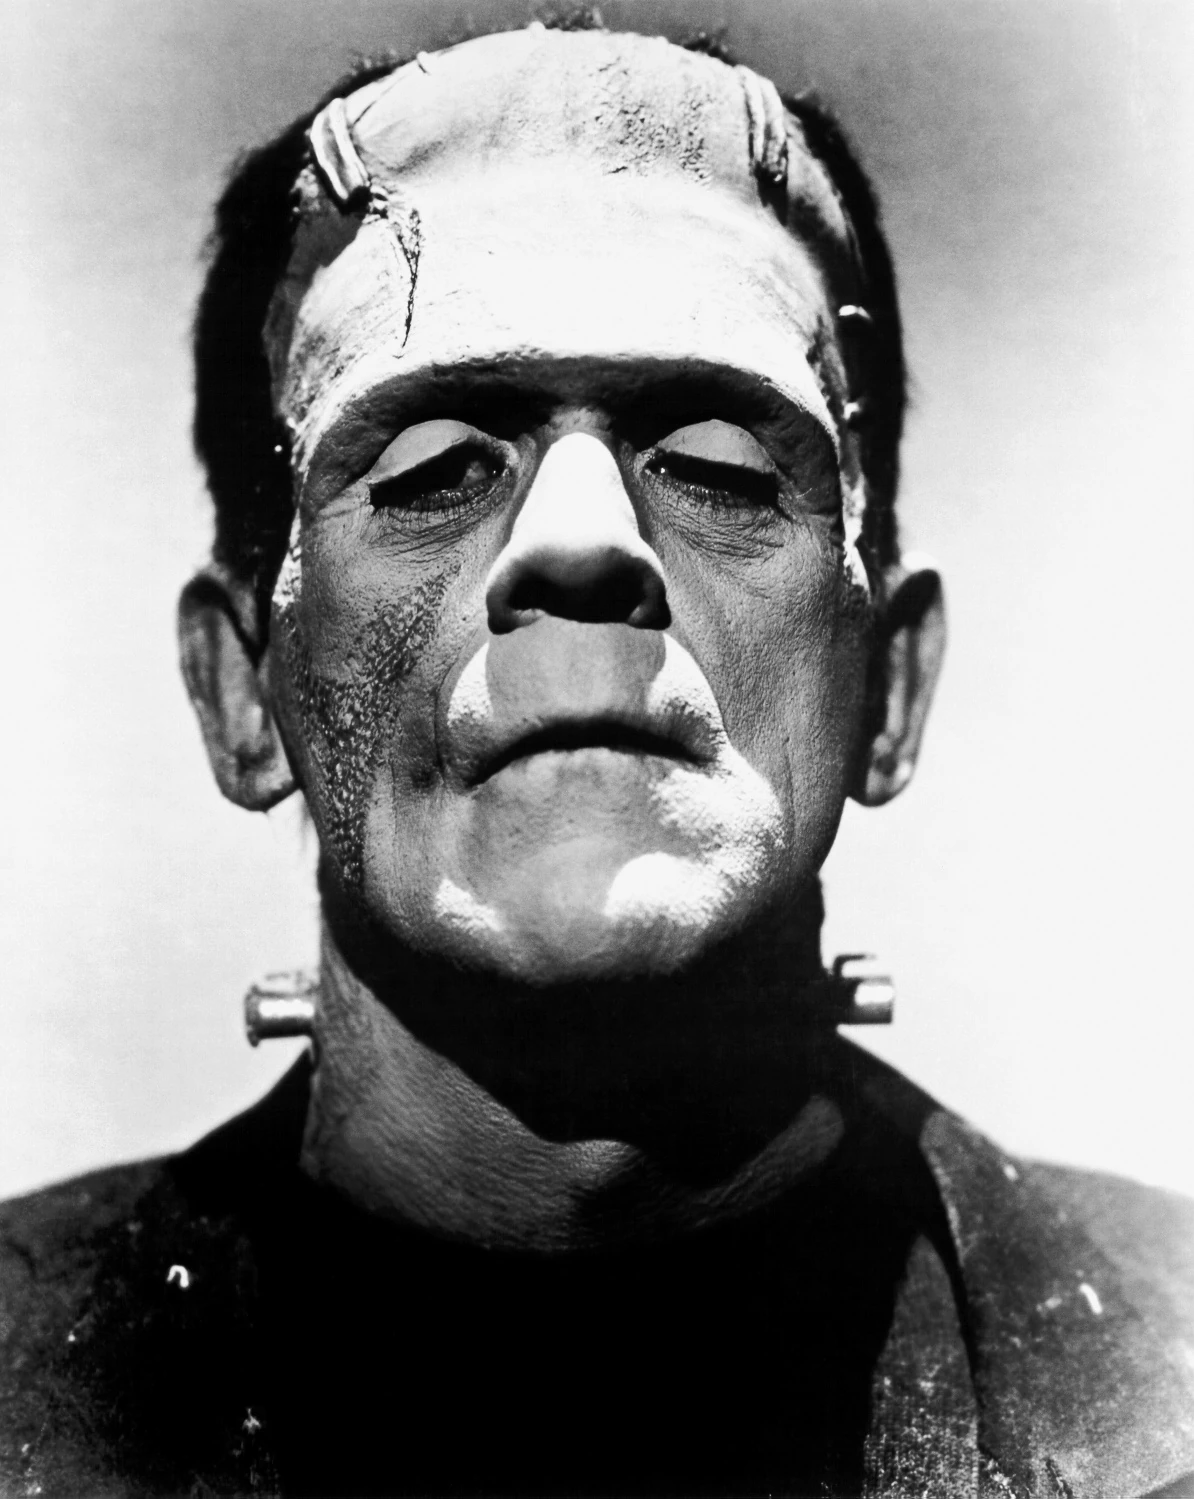
Boris Karloff as the Creature in Bride of Frankenstein (1935).
Frankenstein's monster (or Frankenstein's creature) is a fictional character that first appeared in Mary Shelley's novel, Frankenstein; or, The Modern Prometheus. In the novel, mad scientist Victor Frankenstein creates the creature from many dead bodies. Frankenstein notably neglects to give his creation a name, a symbol of his lack of a parental figure and the absence of any human sense of self and identity. The creature does call himself the "Adam of your labours" after obtaining a Bible and reading it. He is also variously referred to as a "creature", "fiend", "dæmon", "wretch", "spectre", "devil", "being" and "ogre" in the novel. In common parlance, the character is often referred to simply as "Frankenstein".
Castlevania's incarnations of the Creature are based on the famous 1930s Universal film series starring Boris Karloff. The film was based largely on a play by Peggy Webling, performed in London in 1927. In the film, the monster is notably less lucid and more monstrous, lumbering around and unable to form coherent speech, unlike in the book. Curiously, Webling's version of Victor Frankenstein actually does give his creature his name. The Universal film reverted to the empty cypher, however: the film's credits list the character Karloff plays as a series of question marks.
Appearances[]
Castlevania[]
- See also: Igor
Frankenstein is a boss that can give the player a hard time, as not only do they have to deal with him, but also with his miniature hunchbacked partner, Igor. If the player knows how to avoid Igor and his fireballs, both enemies can be defeated considerably easy. When the player first enters the room, it's recommended to run and jump onto the side of the lower right platform to get in some quick hits before Igor starts moving.
Igor will generally hop while he's in the middle of the screen and then jump high when he reaches the platforms in the corners. Hiding on the inside edge of the platforms is recommended, although the player should be ready to move out of the way as Igor won't always follow this pattern exactly. Even though Frankenstein can get in the way, he'll usually stay on right side of the screen for the duration of the fight. Staying close to the platforms will make it easier to jump over the bosses if trapped.
If the player has brought the Holy Water sub-weapon, they will be able to deal some serious damage to Frankenstein and maybe even defeat him right away, while at the same time stun Igor in place and not let him move at all, especially if possessing the Double or Triple Shot (Igor only gets stunned and any damage dealt to him won't deplete the boss's HP bar). Without the Double or Triple Shot, the bosses will likely break out of the stun after a few seconds, but the player should be able to take anywhere between 1/4 to almost 1/3 of Frankenstein's health. After that, hitting him with the whip and stunning him with more Holy Water is recommended.
If the player has the Boomerang, it's recommended to toss them at the boss at the start. Hitting Frankenstein from a distance with the Boomerang will stun him and combining this attack with the whip can also lock Igor.
Vampire Killer[]
Now more appropriately named "Frankenstein Monster", except for a change in his palette, he acts exactly the same as did in the original Castlevania.
Haunted Castle[]
In the arcade title Haunted Castle, Frankenstein is found chained to the far left wall of the late Dr. Frankenstein's laboratory, preventing him from wandering across the screen. He isn't entirely helpless, however, as he can strike the back wall and cause large boulders to come raining down upon the player from the ceiling above. If the player gets too close to him, the monster will swing his chains around in an attempt to knock them away.
This battle can be made harder if the Hunchbacks from the previous screen aren't dealt with prior to the boss fight. If not slain, they will follow the player into the room where Frankenstein dwells.
- Attacks
- Brandish chain
- Falling debris
- Strategy
Frankenstein is chained to the wall, so he himself poses no real danger; however, he can make blocks to drop from the ceiling; these can be destroyed, although it takes a lot of hits. Luckily, a Skeleton right before the boss room will drop a Cross. Shoot Frankenstein repeatedly in the kneecaps with the cross and he'll die in short shrift.
Castlevania II: Simon's Quest[]
There is concept art for a "Franken" enemy that never made it into the game in the Castlevania Anniversary Collection. He is described as only walking toward the player and making the ground shake when collapsing.
Castlevania III: Dracula's Curse[]
The Creature now has abandoned his former comrade Igor when it takes up residence at the end of the Tower of Terror (or the Basement depending on the player's path). In both encounters, the Creature's attack strategy remains the same. He'll come marching in from the left side of the screen and then start to saunter to and fro across the floor, stopping only to stomp the ground to cause an avalanche of bricks to come crashing down from above. If all of the bricks miss the player, the Creature will pull out a new brick and toss it toward them in an arced path.
When the Creature is defeated, it will collapse to the ground and burn up, leaving his skull exposed as he's consumed by the flames.
- Locations
- Tower of Terror (Stage 5A)
- Basement (Stage 6)
- Attacks
- Stomps on the ground, causing harmful debris to fall from the ceiling.
- Throws a stone block at the player.
- Strategy
Like many other bosses that appear in the game, the Creature in is another blast-from-the-past boss enemy from the original Castlevania. Thankfully, however, Frankenstein is a little different in this game than he was in the original version and is a lot easier to defeat. As Frankenstein enters into the room from the left, start jumping up and whipping him in his head; it's his only weak point, and hence the only place you can damage him. When you can get to his left, hit the first block platform with your whip to reveal some meat, which you will probably need, as the stage itself is pretty long and arduous. Frankenstein mainly attacks by stomping on the ground, which causes an earthquake; through this earthquake, debris falls from the ceiling to damage you. Avoid the falling blocks the best you can and bare in mind that you can use the platforms all over the room as protection from the debris by simply standing under them. If you don't want to have to jump and whip to hit him, get on one of these platforms and hack away at his head... just be careful that he doesn't run into you. Also, avoid his seldom used attack, which is throwing a block (identical to the ones that fall from the ceiling) at you. They're easily avoided, however. The battle seems hard, but it's actually quite simple for this stage in the game.
The Creature is also the boss of Block 6, so either path the player takes, they'll end up fighting him. The strategy is the same as in the first battle, only differing about the hidden meat in the destroyable block, and hiding under platforms.
Kid Dracula/Kid Dracula (GB)[]
Frankens make an appearance in both, Boku Dracula-kun and Kid Dracula games.
Wai Wai World 2: SOS!! Parsley Castle[]
Frankens make an appearance in Wai Wai World 2.
Wai Wai Bingo[]
Franken from Boku Dracula-kun makes an appearance as a bingo number along with other Konami characters.
Super Castlevania IV[]
The Creature returns to his late creator's lab in the midst of The Dungeons in Dracula's castle. Its attack strategy has again changed although meandering back and forth still remains. Taking advantage of the shelves of chemical filled vials behind it, the Creature will now hurl these in the player's direction.
- Attacks
- Pink flask: The Creature throws various flasks at the player. The pink one has a small flame come out on the floor. If Simon is standing on a platform the player should not even worry about this, as Simon can hit the flask to destroy it, neglecting the activation of its effect.
- Green flask: In contrast to the pink flasks. the player should worry about this one. When The Creature throws it, it bursts in mid air and flames burst out and fall to the floor. Since it explodes in the air, the player cannot block this move.
- Gray flask: When this hits the floor, another Creature is brought out. While the copy is walking around, the real one will do the same, not throwing anything. Destroying the fake one will end this process. This flask can also be destroyed by the player before activation.
- Strategy
The easiest way to fight the Creature is to remain on the left side of the screen and attack constantly whenever he comes within range.
Castlevania: Rondo of Blood[]
Called Franken in this game, the Creature is merely a pawn of Shaft in a grand scale battle that involves the four main bosses from the original Castlevania: the Giant Bat, Medusa, the Mummy Man and Franken (excluding Death, who has his own boss battle elsewhere).
- Attacks
Franken has three methods of attack which he'll pull off in a random fashion with little to no warning:
- Grabs the player in a choke hold that, if they don't manage to shake free, can quickly lead to death.
- Generates an electric blast from his hands which he then launches at the player.
- Jumps and stomps on the ground, causing debris to come crashing down (a similar attack was first seen in Dracula's Curse, sans the preceding jump).
Attacks/Abilities:
")
.gif "Rob shaft Franken Grabs the player in a choke hold that (1).gif (477 KB)")
")
")
")
")
Castlevania Chronicles[]
The Creature, known in this game as Frankenstein's Monster, returns yet again as a sub-boss stationed in the Torture Chamber/Laboratory (Stage 7). This is perhaps the only time in the series where the player doesn't actually have to fight him, and instead is given the option to use the environment's layout to avoid fighting him altogether, like climbing a set of stairs, walk above him and run away.
When Simon first approaches him, electricity bolts emanating from a strange machine will bring him to life. After rising up from his position, Frankenstein's Monster will proceed to march slowly toward him, madly swinging the chain he's grasping in his hand all the while, and periodically stopping to do a dash attack. It's best to defeat him quickly, as being cornered will spell certain doom for the player.
Castlevania: Bloodlines[]
Frankenstein is encountered midway through The Munitions Factory as a sub boss this time around, with this probably being his tallest incarnation in the series. His only methods of attack are striking the floor with his fist to produce a jolt of electricity that travels to the other end of the screen and swinging a long chain wrapped around his wrist. He doesn't wander much in this title, unlike most of his other appearances.
- Strategy
Use your ultimate item or simply get close and attack quickly. When he swings the chain around, jump away. When he releases it straight, crouch. When he unleashes the lightning bolt along the ground, jump to the platform on the left.
Castlevania: Symphony of the Night[]
This time around, the Creature's appearance has been altered quite a bit from his earlier incarnations complete with a new method of attack: a sledge hammer.
His new appearance comes fully equipped with a new set of attacks. His primary attack being to slam its hammer down into the ground upon the player. At different intervals, the Creature will roll himself up into a ball and roll all around the perimeter of his room, using the slopes to roll onto the walls and ceilings and to increase his overall speed. When in this form, his tubing and machinery pokes out making it harder to perform a jump over his rolling body.
- Strategy
Slash at it and back-dash when he raises its axe. When you see it kneel down, get ready to jump, because its going to roll across the floor, hitting the wall, and then rolling back to the other wall. Jump over it as it approaches you, and see if you can get in a diagonal hit when you land. When he stands back up, continue attacking. Nothing to it. The Tooth of Vlad is your prize.
Castlevania (N64)/Castlevania: Legacy of Darkness[]
The Gardener (properly named Frankenstein Gardener in the US release of Legacy of Darkness) shares many obvious similarities with the traditional depictions of the Creature, including a giant stature, strong body build, green skin, short black hair and multiple scars all over his body. It appears that the Gardener uses the remains of an in-game model intended for a canceled playable character who was to appear in these games, Coller, whose main weapon was supposedly going to be a shotgun which he held in one hand, and a chainsaw mounted in place of his right arm as his secondary weapon.
The Gardener resides in the maze garden of the Villa level in both titles and is equipped with a chainsaw in place of his right arm. He is not a boss in these two titles, but instead serves as a very dangerous immortal hazard. During Reinhardt's and Carrie's campaigns. The player can find the Gardener pruning one of the hedges of the maze, if approached or attacked, he will pursue the player.
After meeting Malus, the player has to escape the Gardener, this time accompanied by two Stone Dogs. The hounds will chase after the player and attempt to hold them by their ankles, allowing the Gardener to catch up and deliver a mortal wound with his chainsaw.
In Legacy of Darkness, Cornell is asked by Mary Oldrey to save her son, Henry, from the Gardener in exchange for the Copper Key. The player is required to escort Henry to the exit while defending him from the Gardener.
The Gardener and the Stone Dogs cannot be killed normally. If attacked repeatedly, they will collapse to the ground for a short time (sometimes leaving gold or a healing item), before rising up again and continue their pursuit. This makes escaping from the garden maze all the more difficult, and only by strategically using sub-weaponry as a means to slow him and his stone comrades down makes it any easier. Unique to the Hard Mode in Legacy of Darkness, trying to pick up the Copper Key in Reinhardt and Carrie's scenario will trigger an extra fight where the Gardener and the Stone Dogs can be killed for good.
Castlevania: Circle of the Moon[]
In this title for the Game Boy Advance, the Creature has been downgraded to the status of a lesser enemy known as Franken, and only makes his appearance in the Eternal Corridor after the player defeats Death in the Underground Warehouse.
He lumbers along very slowly, only to stop and deliver a two-fisted downward smash whenever the player wanders too close to him. His power shouldn't be underestimated, though, as he can deal large amounts of damage even if the player has a high level. However, while fighting them is completely optional (the player shouldn't even revisit the areas where they appear in a normal playthrough), it's worth paying them a visit as they drop two of the highest STR enhancing armors in the game: the Ninja Garb (STR +30, DEF +80) and the Soldier Fatigues (STR +50, DEF +120, LCK +10).
Castlevania: Dawn of Sorrow[]
For the first title on the DS handheld, the Creature remains a (though rather strong) lesser enemy in the game appearing ever so rarely throughout the castle.
When approached, the Creature is activated by a few bolts of lightning. Afterward, it proceeds to stroll slowly in the player's direction only to speed up tremendously when it draws within close proximity of the player's position.
The Creature's main method of attack is his electrically charged hammering fist, which has great range and is dealt very quickly, making it difficult to dodge.
His soul is one of the hardest (though certainly not the hardest) souls to obtain in the entire game. It grants the Regenerator ability, which allows Soma to restore HP gradually.
Castlevania: Portrait of Ruin[]
The Creature returns as the boss in the Dark Academy. He once again springs to life after being charged by lightning bolts (which apparently has become a tradition in the series). Even though he uses the same sprite set he had in Rondo of Blood, he now counts with a whole new range of techniques in addition to his classic ones.
- Attacks
- He keeps his old grabbing-choke hold technique.
- He also keeps its clenched dual-fisted beam, which is now a series of lightning bolts rather than a beam.
- He's now able to perform a diagonal leap into the air and then comes crashing down hard on the player. He has a notorious quick reacting time for performing this move and will almost instantly do it whenever the player tries to jump over him, catching them in midair.
- He's now also able to launch a powerful heat-seeking missile or a barrage of machine gun bullets from its elbow's mounted turret.
- He no longer causes blocks to rain down from the ceiling.
A cheap tactic to use in order to negate some of his attacks is to call Charlotte and have her use either Dark Rift or Tempest to suck up both the missile and the machine gun's bullets.
When defeated, the Creature dies in a similar manner to how he did in Castlevania III: Dracula's Curse.
Two Creatures appear at the same time in one of the later levels in the Nest of Evil, making that room one of the most difficult to beat. After fighting them for awhile, the doors will open and the player can then escape to the next room, although if they're trying to gain experience, then the fight may be necessary. The best tactic to beat both of them is to use the Greatest Five Dual Crush. However, due to its high MP cost, as well as the likely necessity to cast the spell several times (not to mention it is actually the reward for completing the Nest of Evil, making its use only applicable on revisits to this room), it's highly advisable to have the Magus Ring equipped on one of the characters.
Castlevania: Order of Ecclesia[]
The Creature is a common enemy in this game. He can shoot lightning from his hands and can also switch one of his hands for a hidden flamethrower and launch a medium-sized flame with it which he spreads up and down. Other than that, he uses kicks as a normal form of attack. He is remarkably resilient at the point in the game when he's first encountered, although he's also weak to Slash attacks. A viable way to easily defeat him is to equip two glyphs with this attribute on each hand (like Secare or Hasta) and cast three or four Glyph Unions on him (and finish him off with normal attacks if he's still alive).
The first Creature can be found inside a large laboratory located midway through the Minera Prison Island. This is the same room where Shanoa first catches up with Albus and he forces her to absorb the Dominus Hatred glyph. If Shanoa reenters the room, a Creature will now be found inside it.
Two other variations of the Creature appear later in the game, called Enkidu and (aptly named) Rebuild. In addition, the boss of the Giant's Dwelling, Goliath, also bears an overall similar design to the Creature, although being much larger.
Castlevania: The Adventure ReBirth[]
Like in Bloodlines, the Creature appears as a miniboss in the clock tower stage. It has two separate attacks: Summoning a sphere of electric energy and producing an electric current that slides along the ground. It can sometimes use both attacks at the same time.
Castlevania Puzzle: Encore of the Night[]
The Creature makes an appearance in Encore of the Night.
Castlevania: Harmony of Despair[]
The Creature makes an appearance in Harmony of Despair.
Super Smash Bros. Ultimate[]
The Creature appears in Dracula's Castle and also appears as Spirit.
Other media[]
Famicom Cap[]
The Creature appears in Volume 3.
Captain N: The Game Master[]
The Creature appears in the episode "The Most Dangerous Game Master".
Enemy Data[]
- Main article: The Creature/Enemy Data
Item Data[]
| Item Data: The Creature | ||||||||
|---|---|---|---|---|---|---|---|---|
| Image | Name - Game Type - Users Description |
Attributes / Consume | Statistics / Sell | Found | Notes | |||
| 1 of 5 Treasures. STR +10 | STR +10 |
Find: Reverse Outer Wall Guard: The Creature |
||||||
| A black ninja suit | DEF +80, STR +30 |
Drop: Franken, Were-Jaguar |
||||||
| Fatigues normally worn by soldiers | DEF +120, STR +50, LCK +10 |
Drop: Catoblepas, Franken |
||||||
| May give the illusion of bulking up muscle mass. | HP +40 Sell: $50 |
Common Drop: The Creature |
||||||
| Restore HP gradually. | Rarity: *** Drop: The Creature |
|||||||
| Are you brave enough to open it? | HP -100 Sell: $25 |
Rarity: * Drop: The Creature (5.30 %) |
||||||
| Explodes for fire damage one second after the pin is pulled. | Attrib: Fire Consume: 12 MP |
ATK +10 |
Rarity: ** Find: Green Chest (Chapter 2/3/4) Drop: The Creature (4.3%) |
Evolve: Stronger with each Lv.; Three hits at Lv. 5, stick grenade at Lv. 9 | ||||
| Armor that increases damage, both dealt and received. | Attrib: Strike -50, Slash -50, Pierce -50, Fire -50, Ice -50, Lightning -50, Holy -50, Darkness -50 |
HP -20, STR +10, CON -20, MND -20 Sell: $11,250 |
Rarity: ***** Drop: Death (Hard), R. The Creature |
|||||
| Restore HP gradually. | Rarity: **** Steal: The Creature (0.8%) |
Effect: Regeneration | ||||||
Gallery[]
- Main article: The Creature/Gallery
Trivia[]
- The Creature is based on the monster created by Dr. Frankenstein from the classic horror tale Frankenstein; or, The Modern Prometheus by Mary Shelley. The monster is often mistakenly called "Frankenstein". Her name for the Creature, though not used in the novel, was "Adam", in reference to the Biblical "first man".
- Up until Castlevania: Symphony of the Night, the Creature was referred to as "Frankenstein" within the games.
- This has been a common misconception that is not limited to the Castlevania series, but probably since the character's introduction into popular media; however, the name "Frankenstein" is actually the surname of its creator, Victor Henry Frankenstein. In the novel, the monster is never given a name and is instead called by different monikers, including "creature", "fiend", "spectre", "demon", "wretch", "devil", "thing", "being", "ogre", and most properly, "Frankenstein's monster".
- The Creature makes a brief appearance in the 1993 Konami arcade game Quiz Gakumon no Susume.
- The Creature's overall appearance was reused for Goliath in Castlevania: Order of Ecclesia.
See also[]
- Enkidu
- Goliath
- Igor
- Iron Gladiator - Another monster that was created by stitching dead bodies together.
- Rebis
- Rebuild
- Victor Frankenstein
| Super Castlevania IV |
|---|
| Characters |
| Simon Belmont • Dracula |
| Bosses |
| Rowdain • Medusa • Orphic Vipers • Puweyxil • Koranot • The Dancing Spectres • Sir Grakul • The Monster Zapf Bat • Akmodan II • Slogra • Gaibon • Death |
| Areas |
| The Drawbridge, The Fortress, The Stables • The Forest, The Poison Lake, The River The Caverns, The Waterfalls, The Moat • The Outer Keep • The Castle Court • The Halls • The Unliving Quarters The Dungeons • The Treasury • The Clock Tower • The Castle Keep |
| Music |
| Theme of Simon Belmont • Akumajō Dracula Best 2 |
| Guides |
| All About Akumajō Dracula • Famitsū Akumajō Dracula Guide • Nintendo Power Super Castlevania IV Guide |
| Archives |
| Bestiary • Inventory |
| Castlevania: Bloodlines |
|---|
| Characters |
| Protagonists |
| John Morris • Eric Lecarde |
| Antagonists |
| Elizabeth Bartley • Drolta Tzuentes • Dracula |
| Bosses |
| Hellhound • Armor Battler • Wizard • Heavy Armor • Great Axe Armor • Golem • Snake Dragon • Gargoyle The Creature • Gear Steamer • Talos • Silhouette Demon • Princess of Moss • Death • Medusa |
| Stages |
| Ruins of the Castle Dracula • Atlantis Shrine • The Leaning Tower of Pisa The Munitions Factory • Versailles Palace • The Castle Proserpina |
| Music |
| Akumajō Dracula X |
| Guides |
| MegaDriveFAN |
| Archives |
| Bestiary • Inventory |